> ## Documentation Index
> Fetch the complete documentation index at: https://docs.keywordsai.co/llms.txt
> Use this file to discover all available pages before exploring further.
# Create a prompt
> A guide to create, version, deploy, and share prompts.
## What is Prompts?
Prompts are instructions that guide LLM responses. You can create, version, share, and deploy prompt templates easily.
## Why use Prompts?
* You can create, version, share, and deploy prompt templates.
* You can collaborate with your team on prompts easily.
* You can monitor prompt performance.
## Quick start
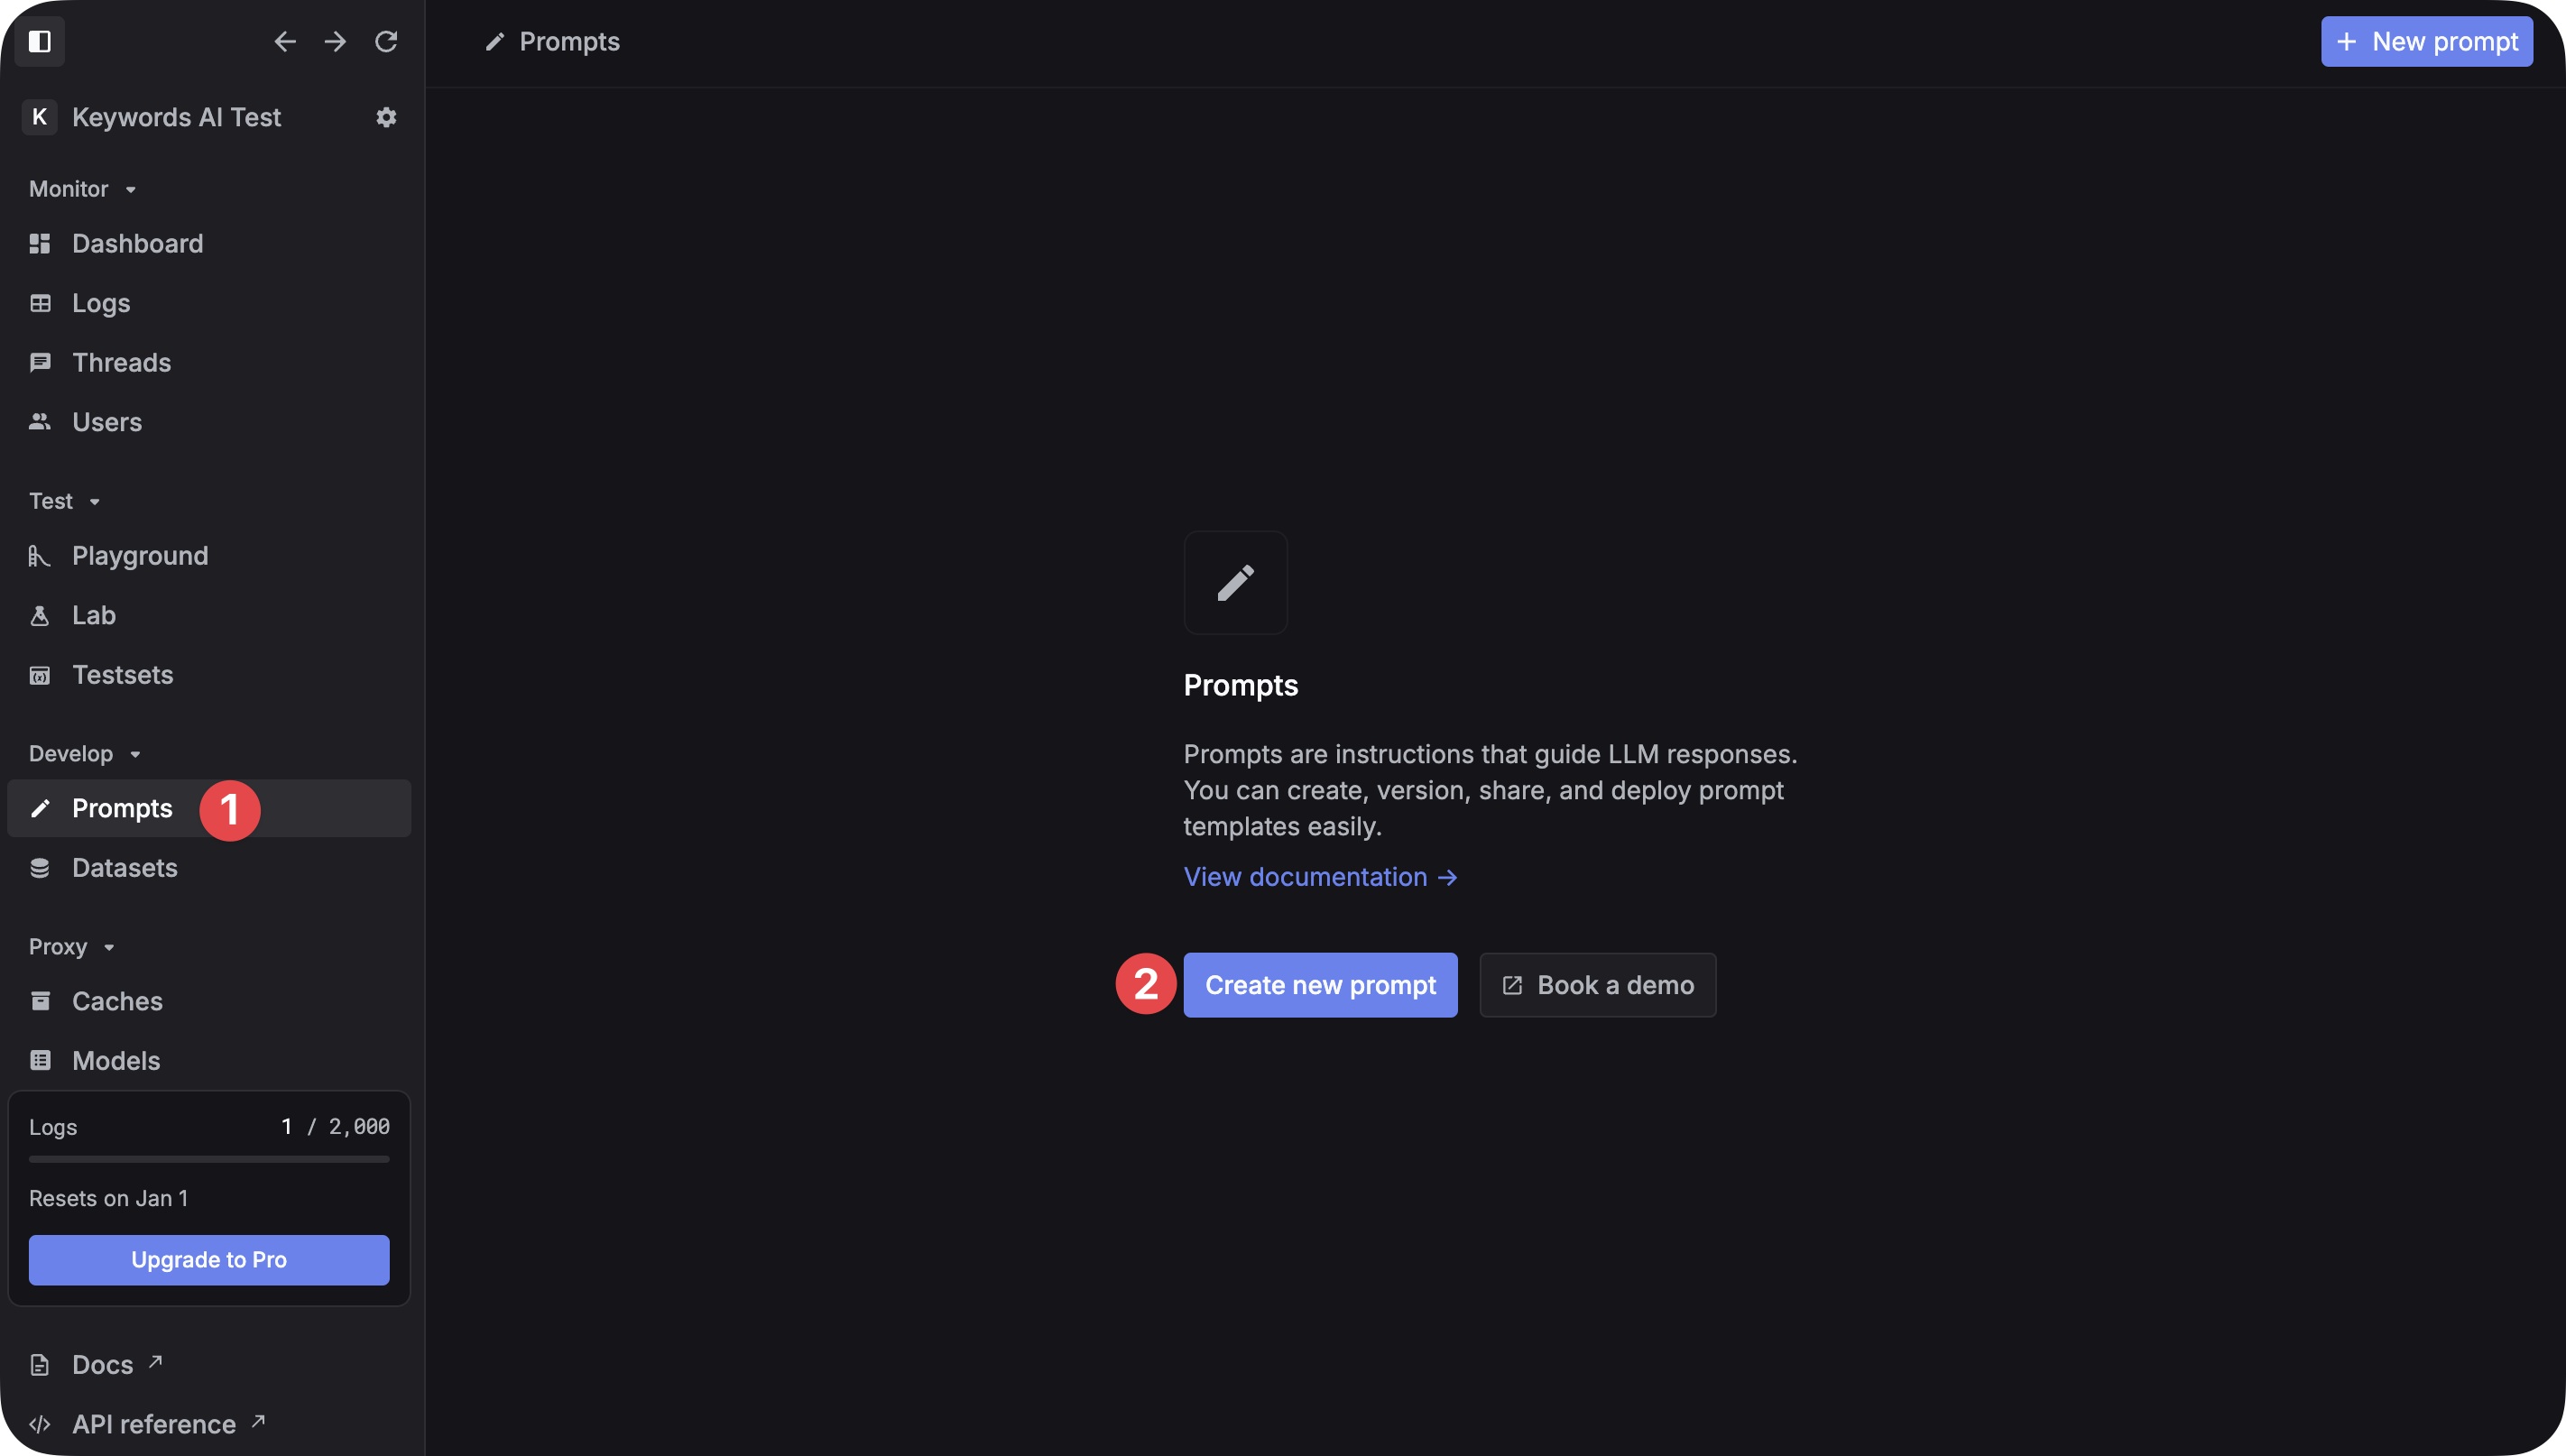
Once you have signed up and created an account, you can create a new prompt on the platform. Go to the [Prompts page](https://platform.keywordsai.co/platform/prompts) and click on the "Create new prompt" button. You should name your prompt and could add a description to it.
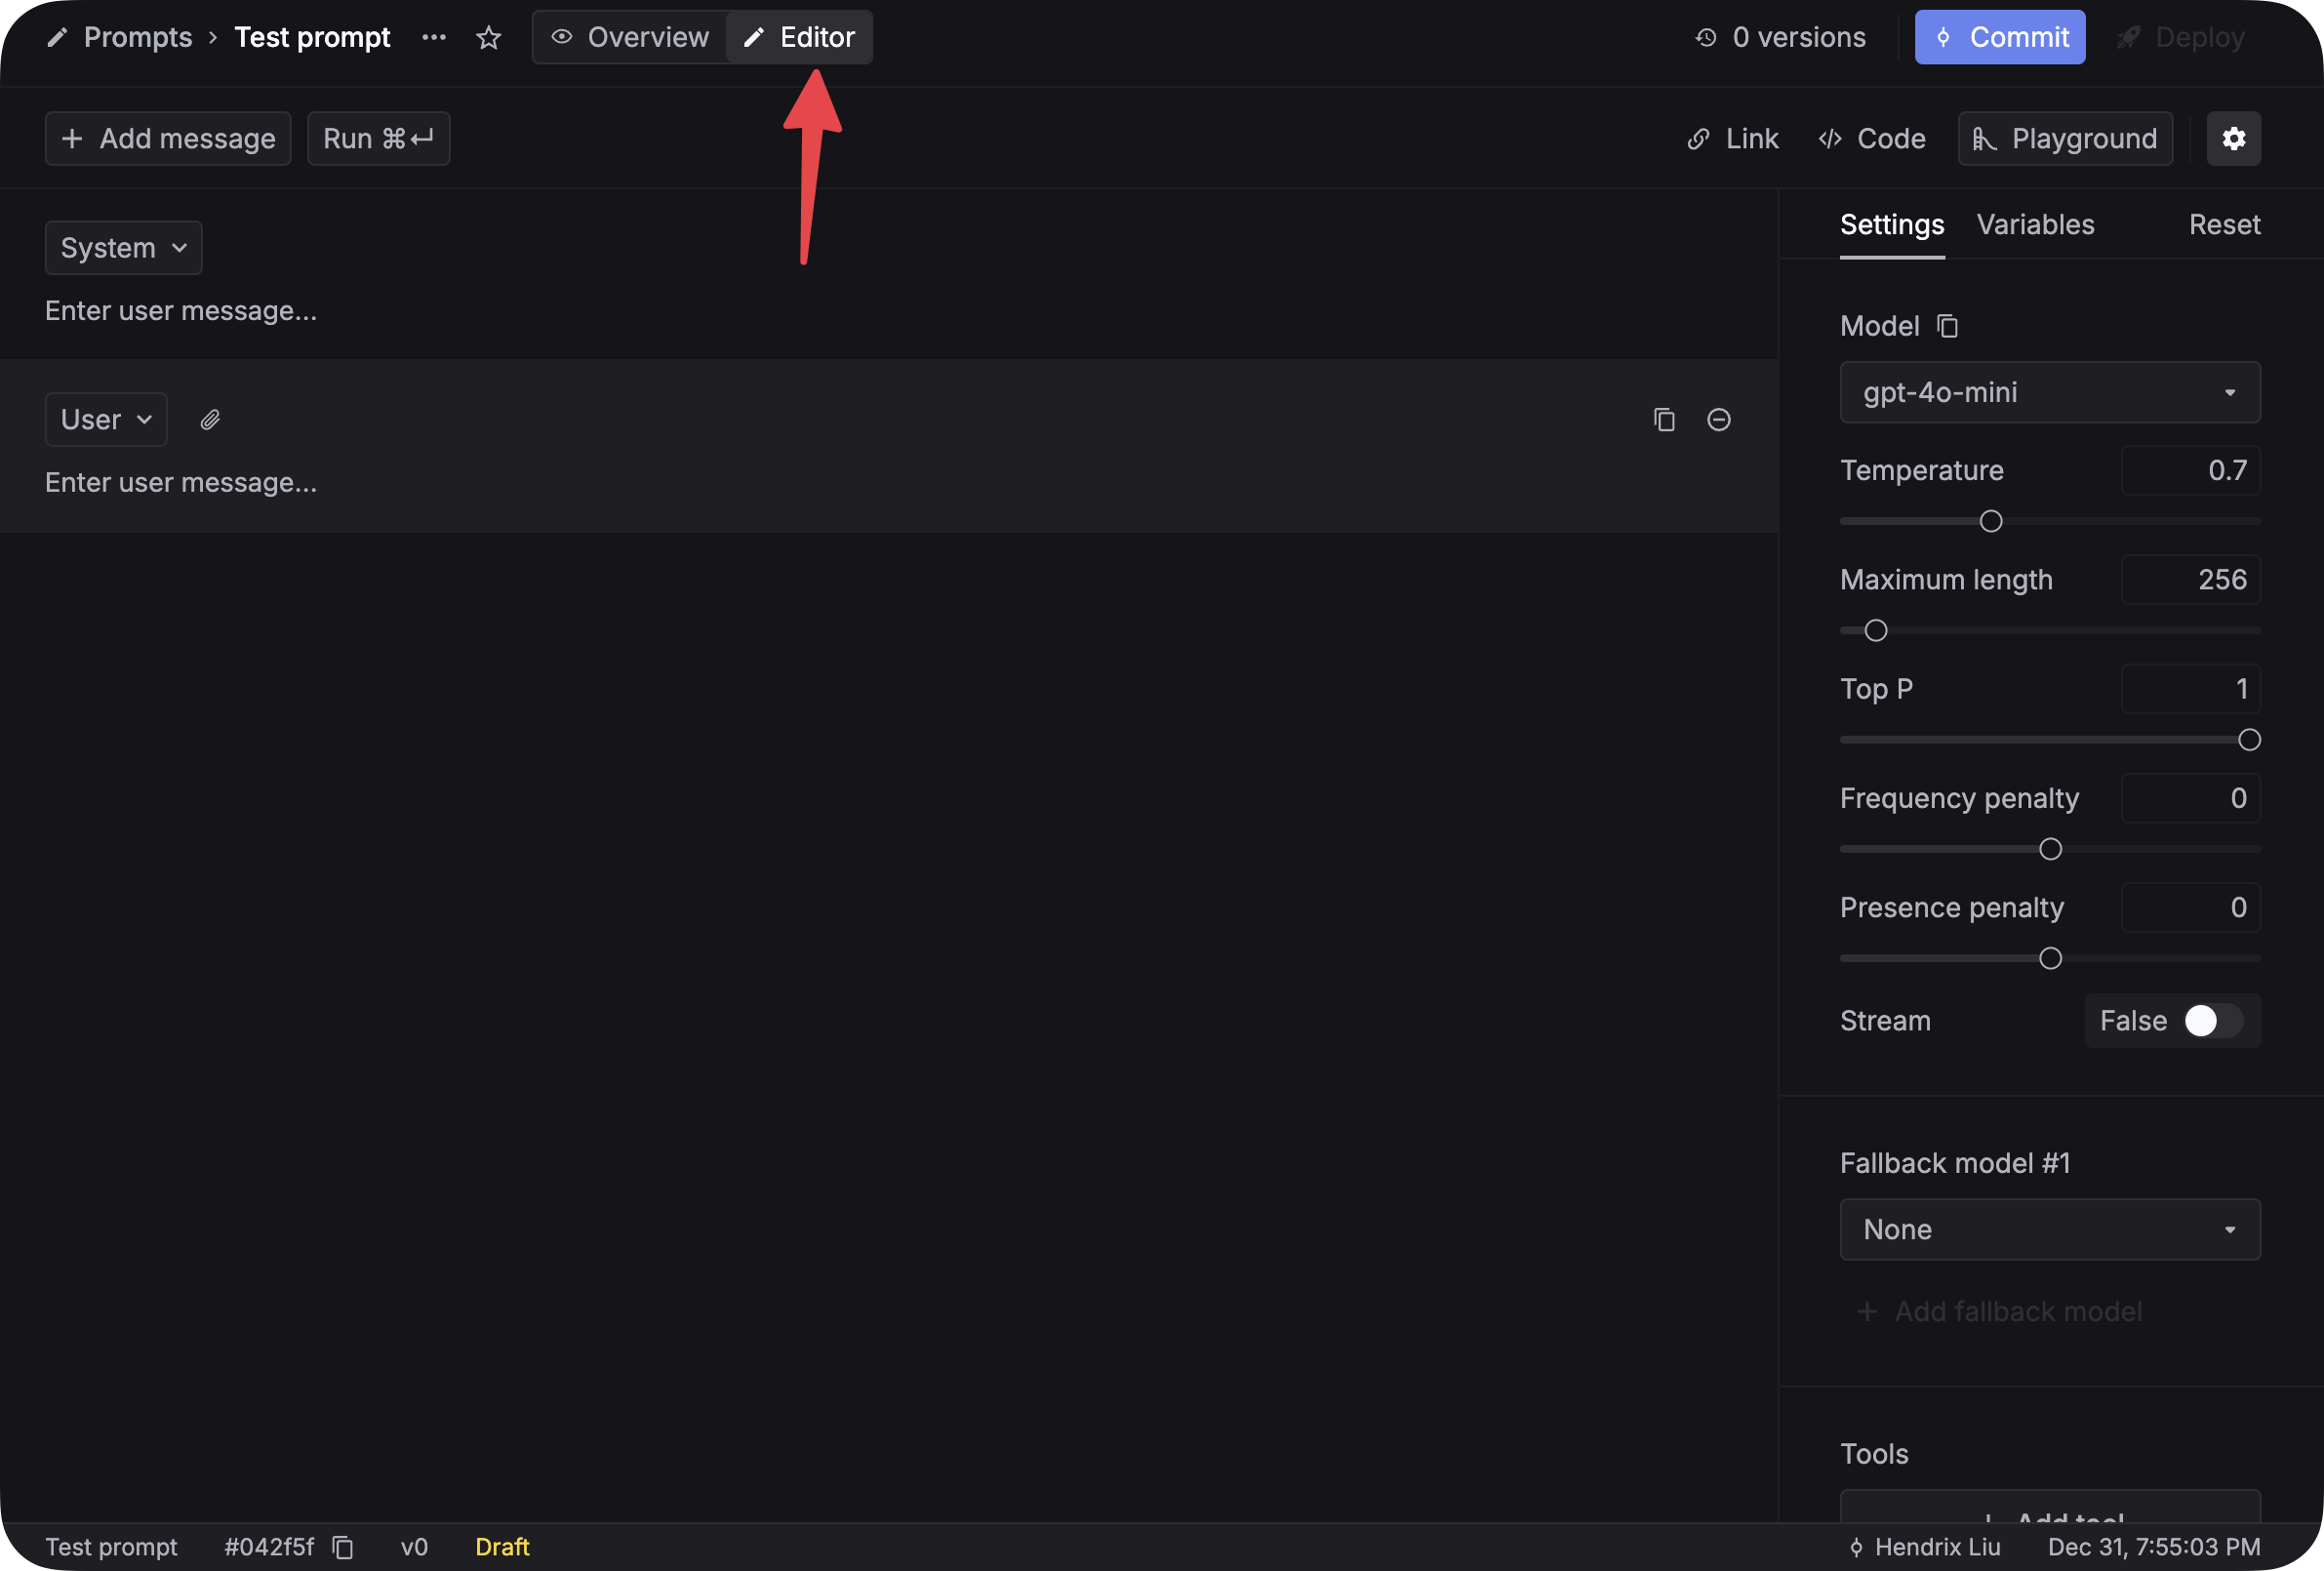
 Once you have created a new prompt, you can configure it. Go to the `Editor` tab and you can begin to write your prompt. The right side of the screen defines your prompt. You can set parameters like `Model`, `Temperature`, `Max Tokens`, and `Top P`. You can also add function calls and fallback models to your prompt. Check out the details [here](/api-endpoints/observe/logs/request-logging-endpoint).
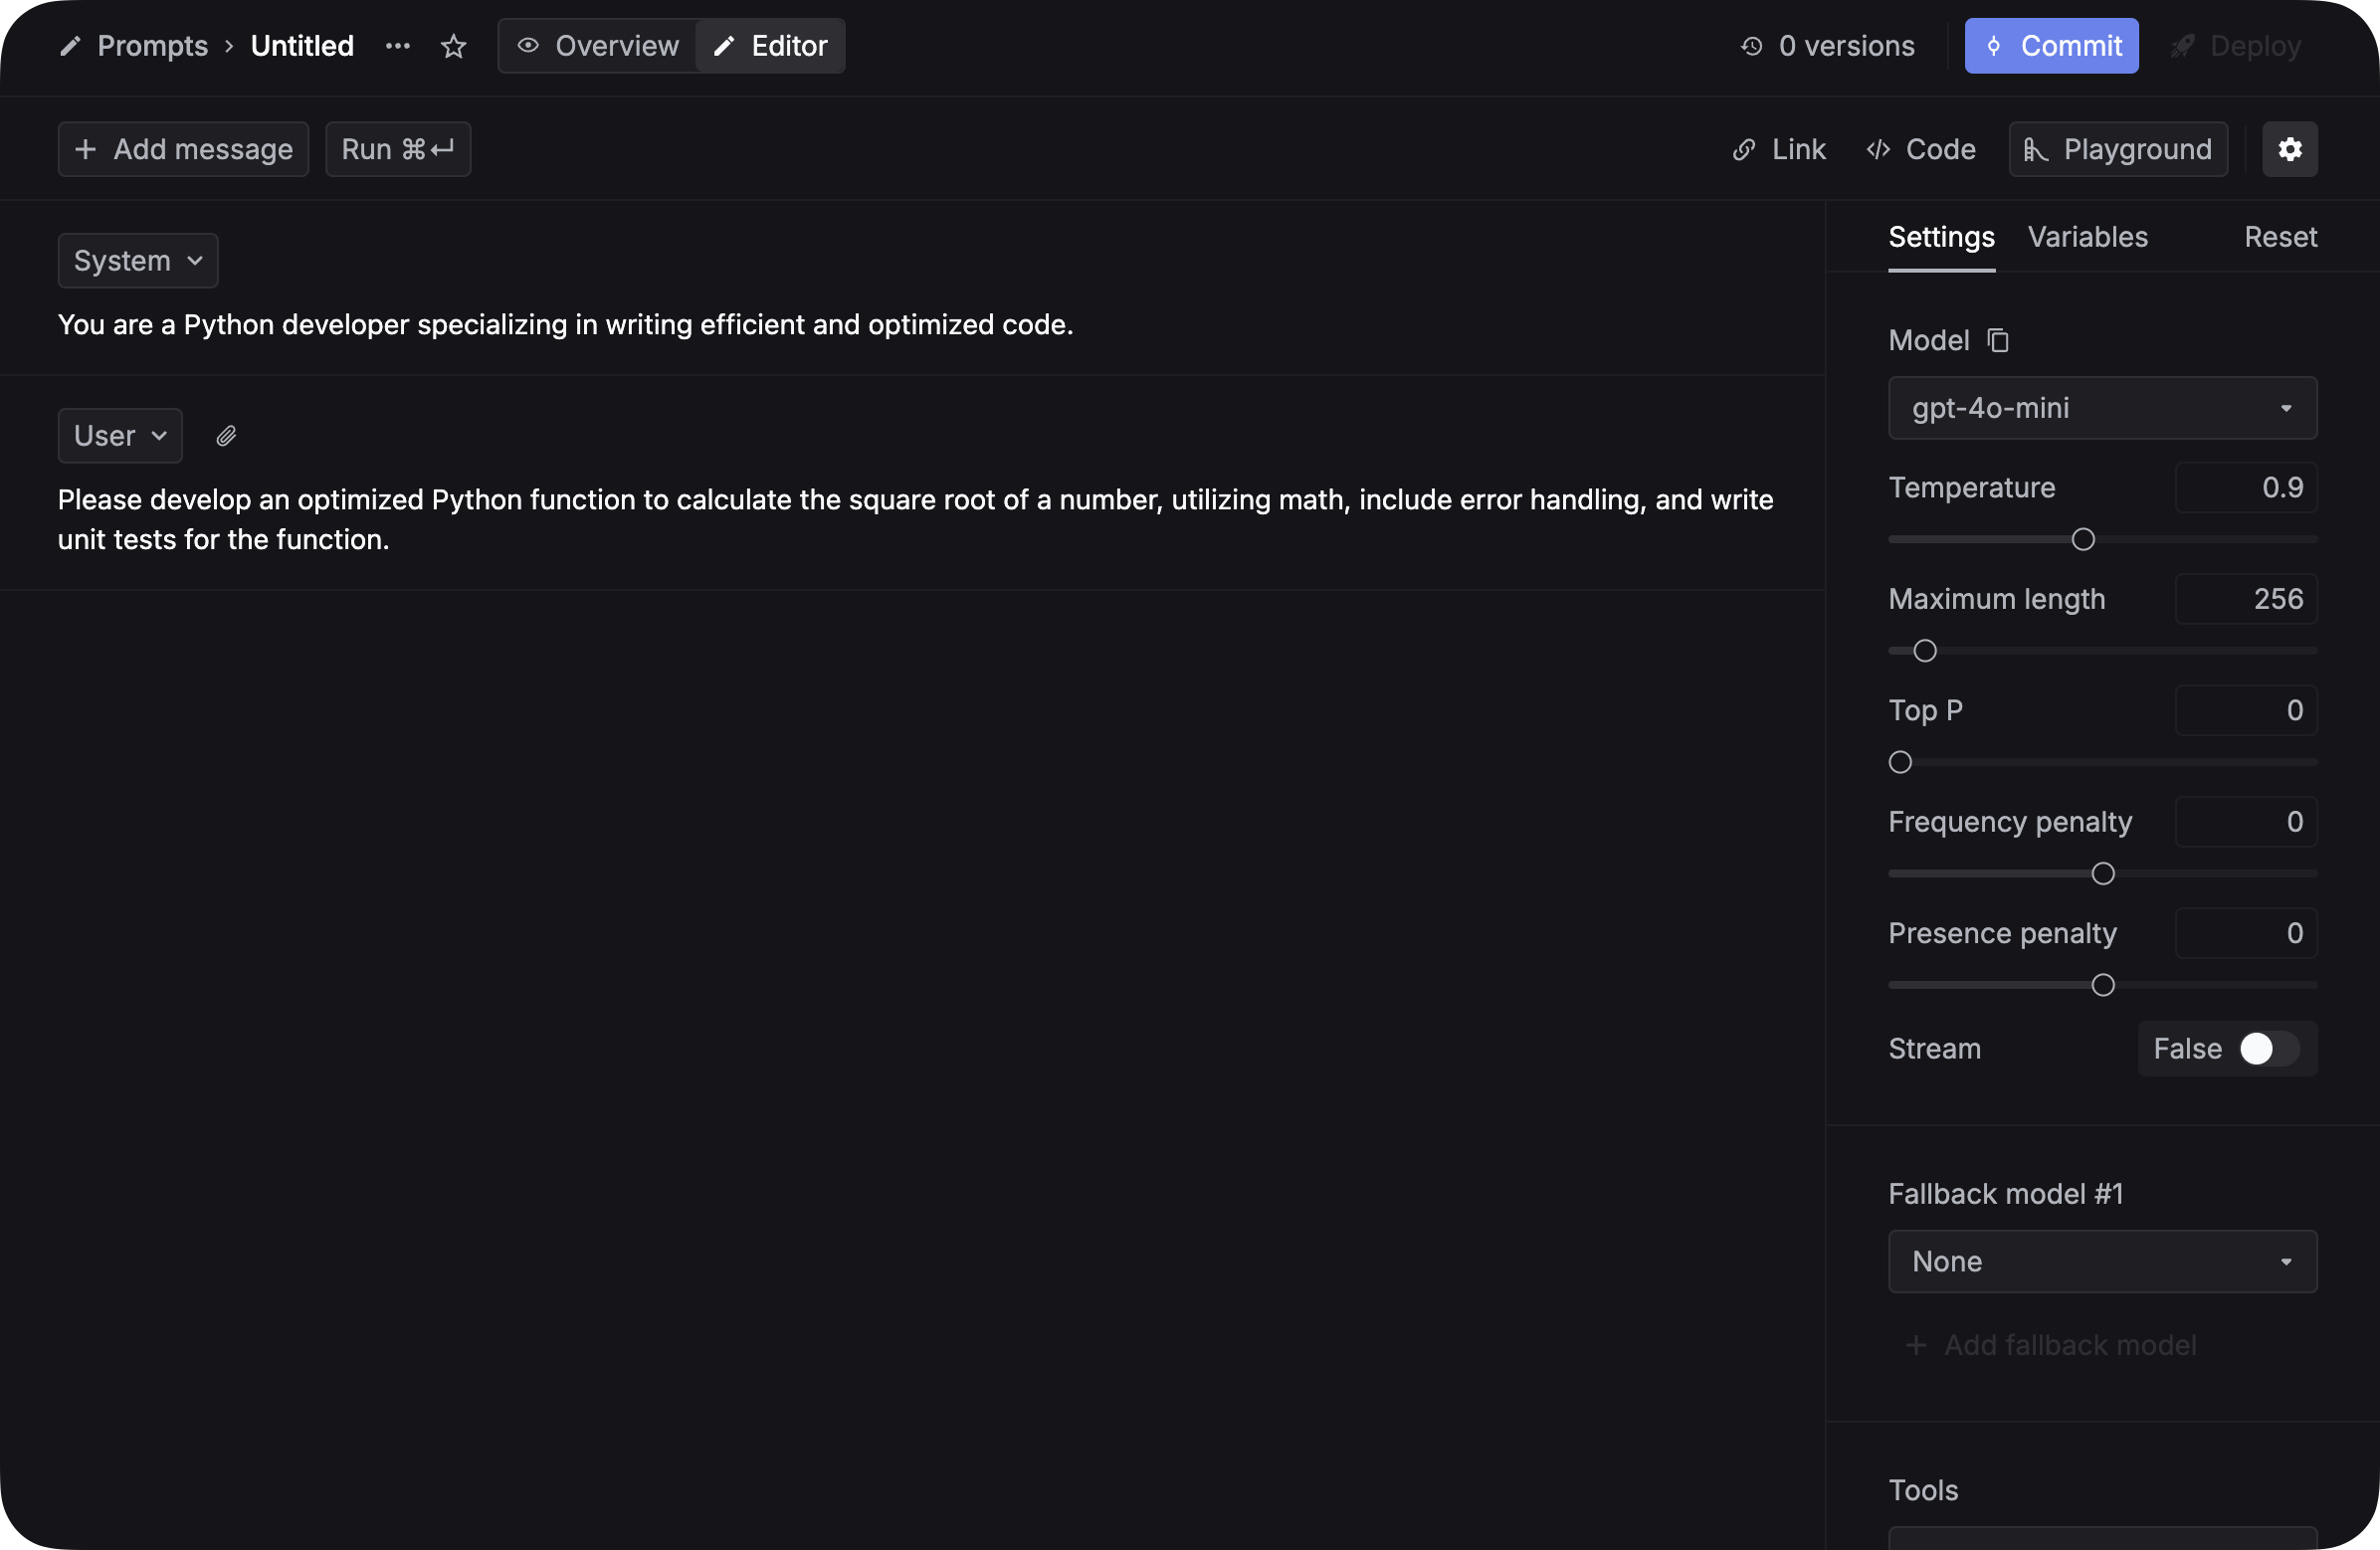
 Once you have configured your prompt, you can write the content of your prompt. Click on the `+ Add message` button to add a new message to your prompt. You can change the role of the message to `user` or `assistant` by clicking on the role name.
 You can also add variables to your prompt. Variables are placeholders for dynamic content that can be used to generate prompts. Simply add double curly braces `{{variable_name}}` to your prompt and you will be able to use the variable in your prompt.
Replace the User message with this:
```
Please develop an optimized Python function to {{task_description}},
utilizing {{specific_library}},include error handling, and write unit tests for the function.
```
The format of the variable can't be `{{task description}}`. It should be `{{task_description}}` with "\_" instead of spaces.
You can also add variables to your prompt. Variables are placeholders for dynamic content that can be used to generate prompts. Simply add double curly braces `{{variable_name}}` to your prompt and you will be able to use the variable in your prompt.
Replace the User message with this:
```
Please develop an optimized Python function to {{task_description}},
utilizing {{specific_library}},include error handling, and write unit tests for the function.
```
The format of the variable can't be `{{task description}}`. It should be `{{task_description}}` with "\_" instead of spaces.
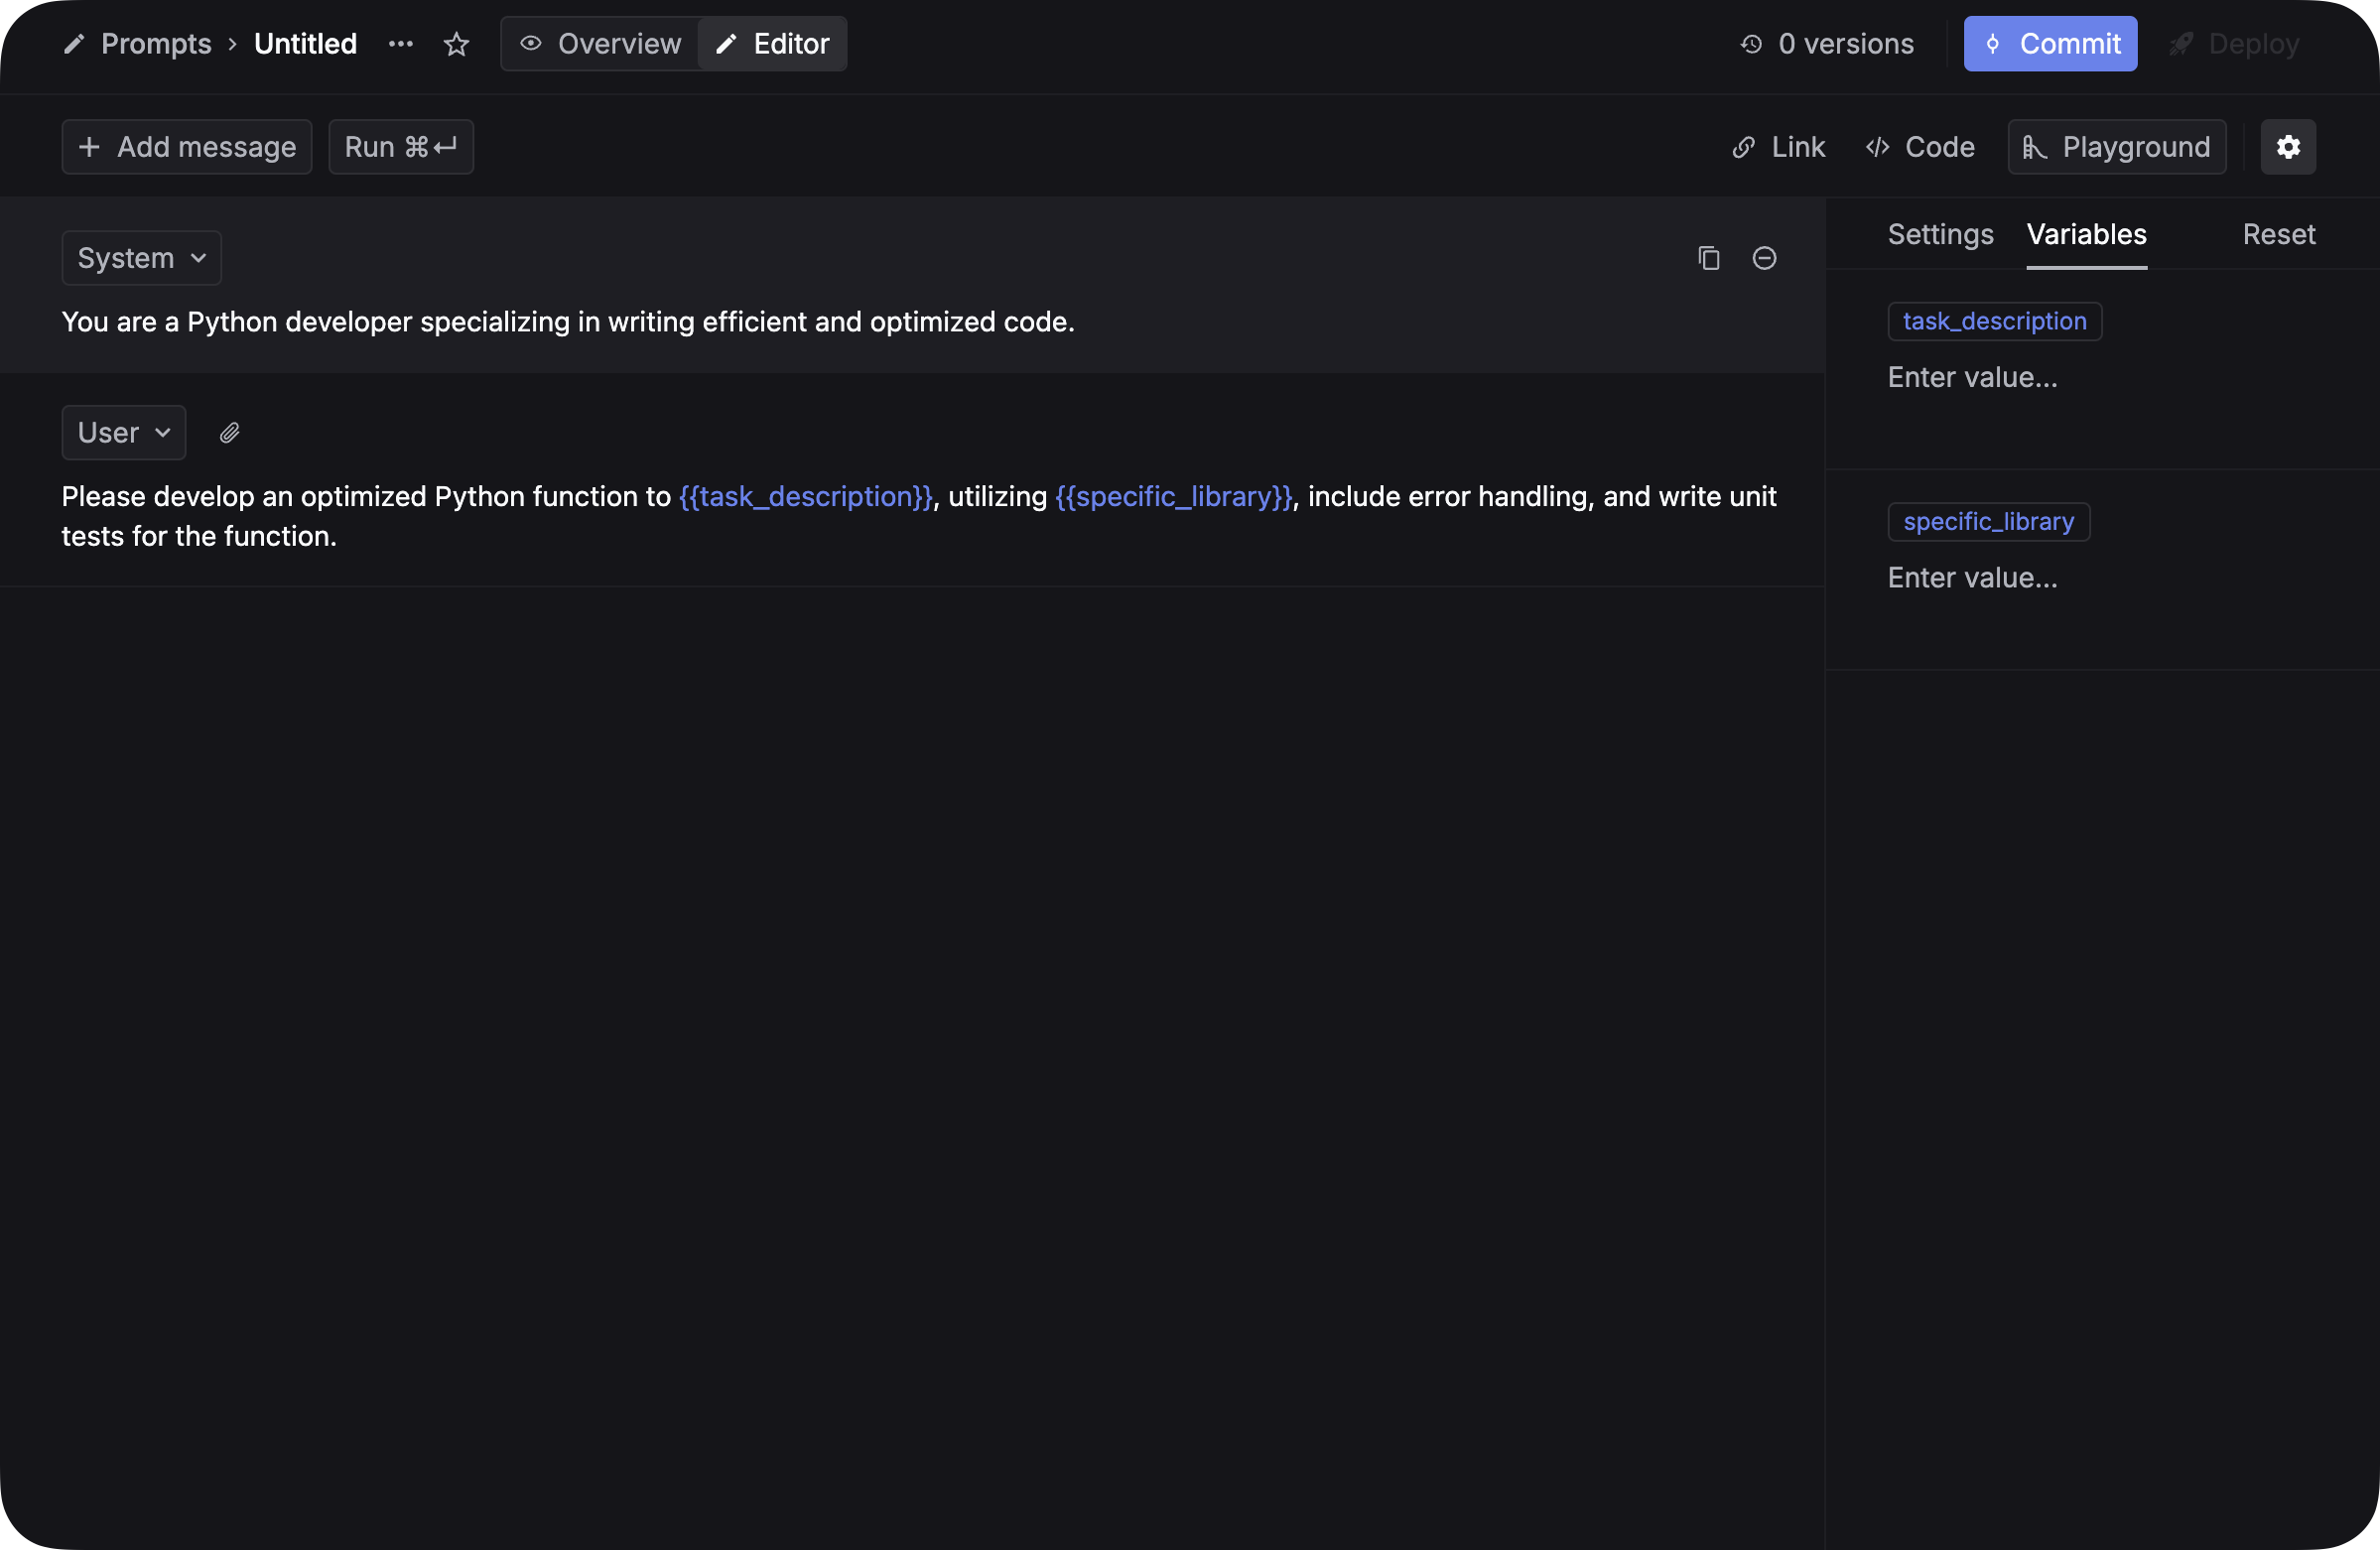 After did this, you can:
1. Add a value for each variable in the `Variables` tab.
2. Click `Run` to test your prompt.
You now just finished writing your first version of the prompt.
You can click on the `Commit` button and write a commit message, which is helpful for you to track the changes you made to your prompt.
After did this, you can:
1. Add a value for each variable in the `Variables` tab.
2. Click `Run` to test your prompt.
You now just finished writing your first version of the prompt.
You can click on the `Commit` button and write a commit message, which is helpful for you to track the changes you made to your prompt.
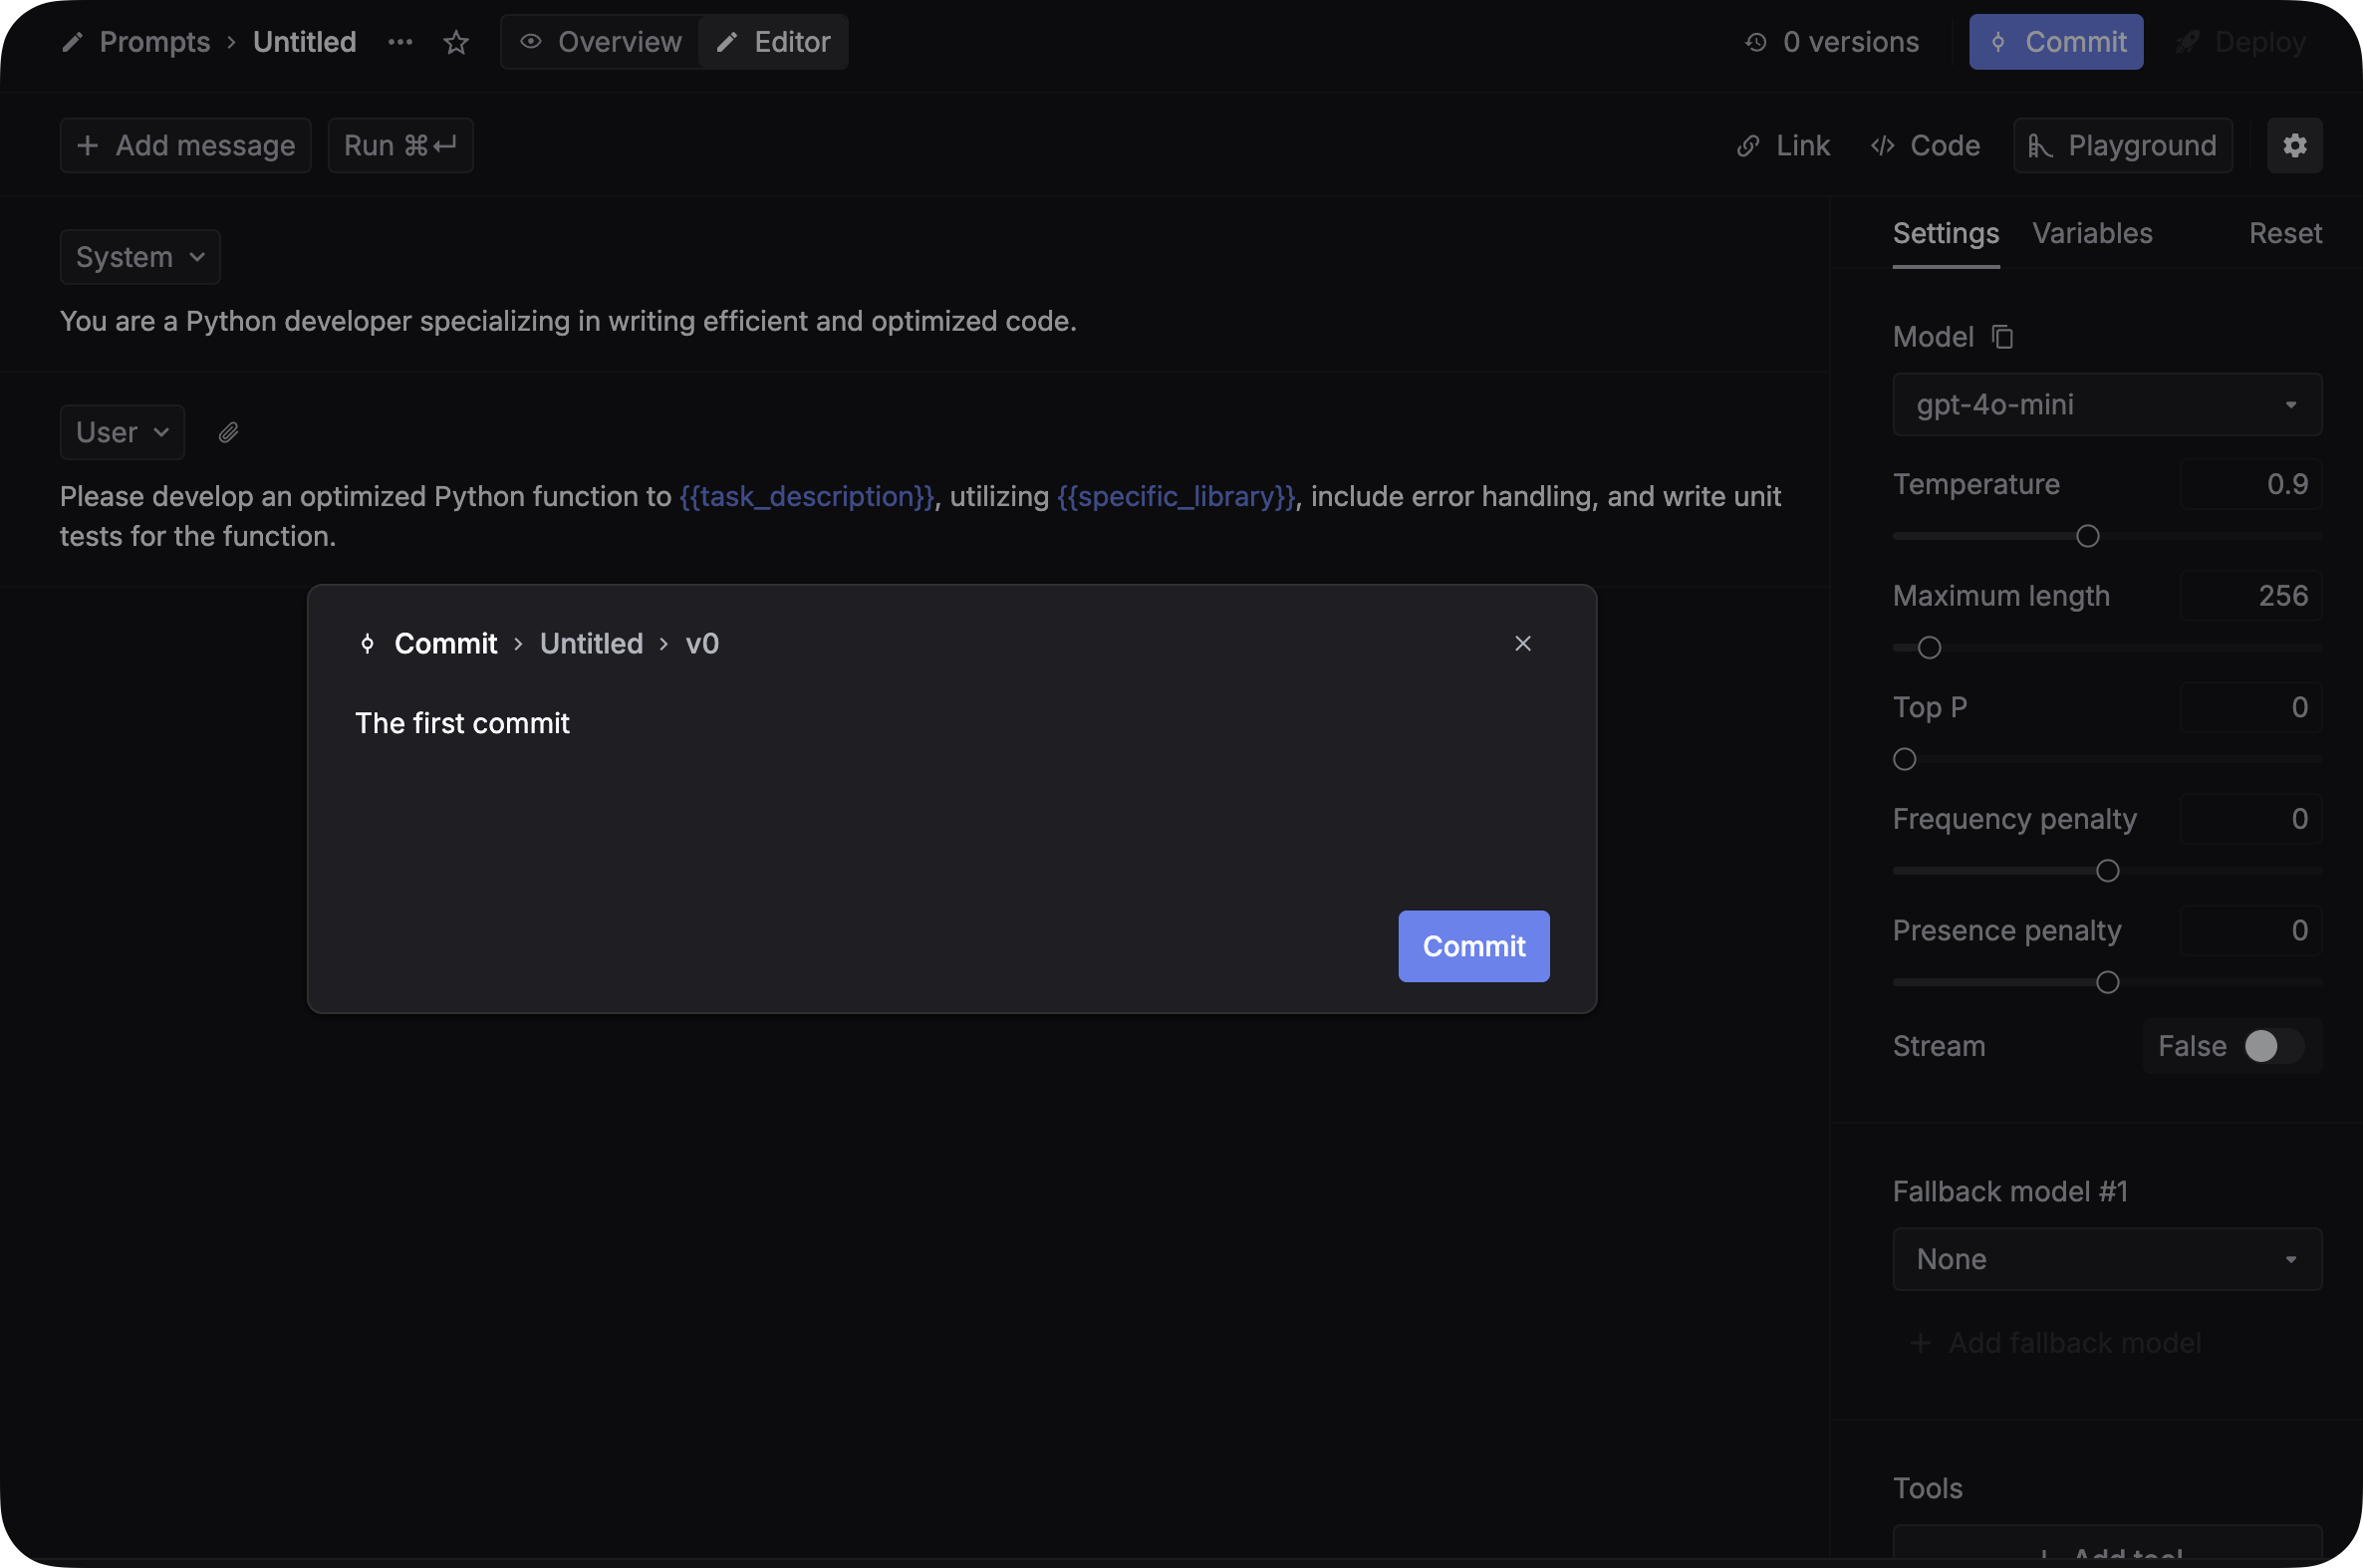 Congrats! You just created your first prompt on Keywords AI platform.
Once you have committed your prompt, you can deploy it to production. Go to the `Deployments` tab and click on the `Deploy` button. You can choose the environment you want to deploy to.
Congrats! You just created your first prompt on Keywords AI platform.
Once you have committed your prompt, you can deploy it to production. Go to the `Deployments` tab and click on the `Deploy` button. You can choose the environment you want to deploy to.
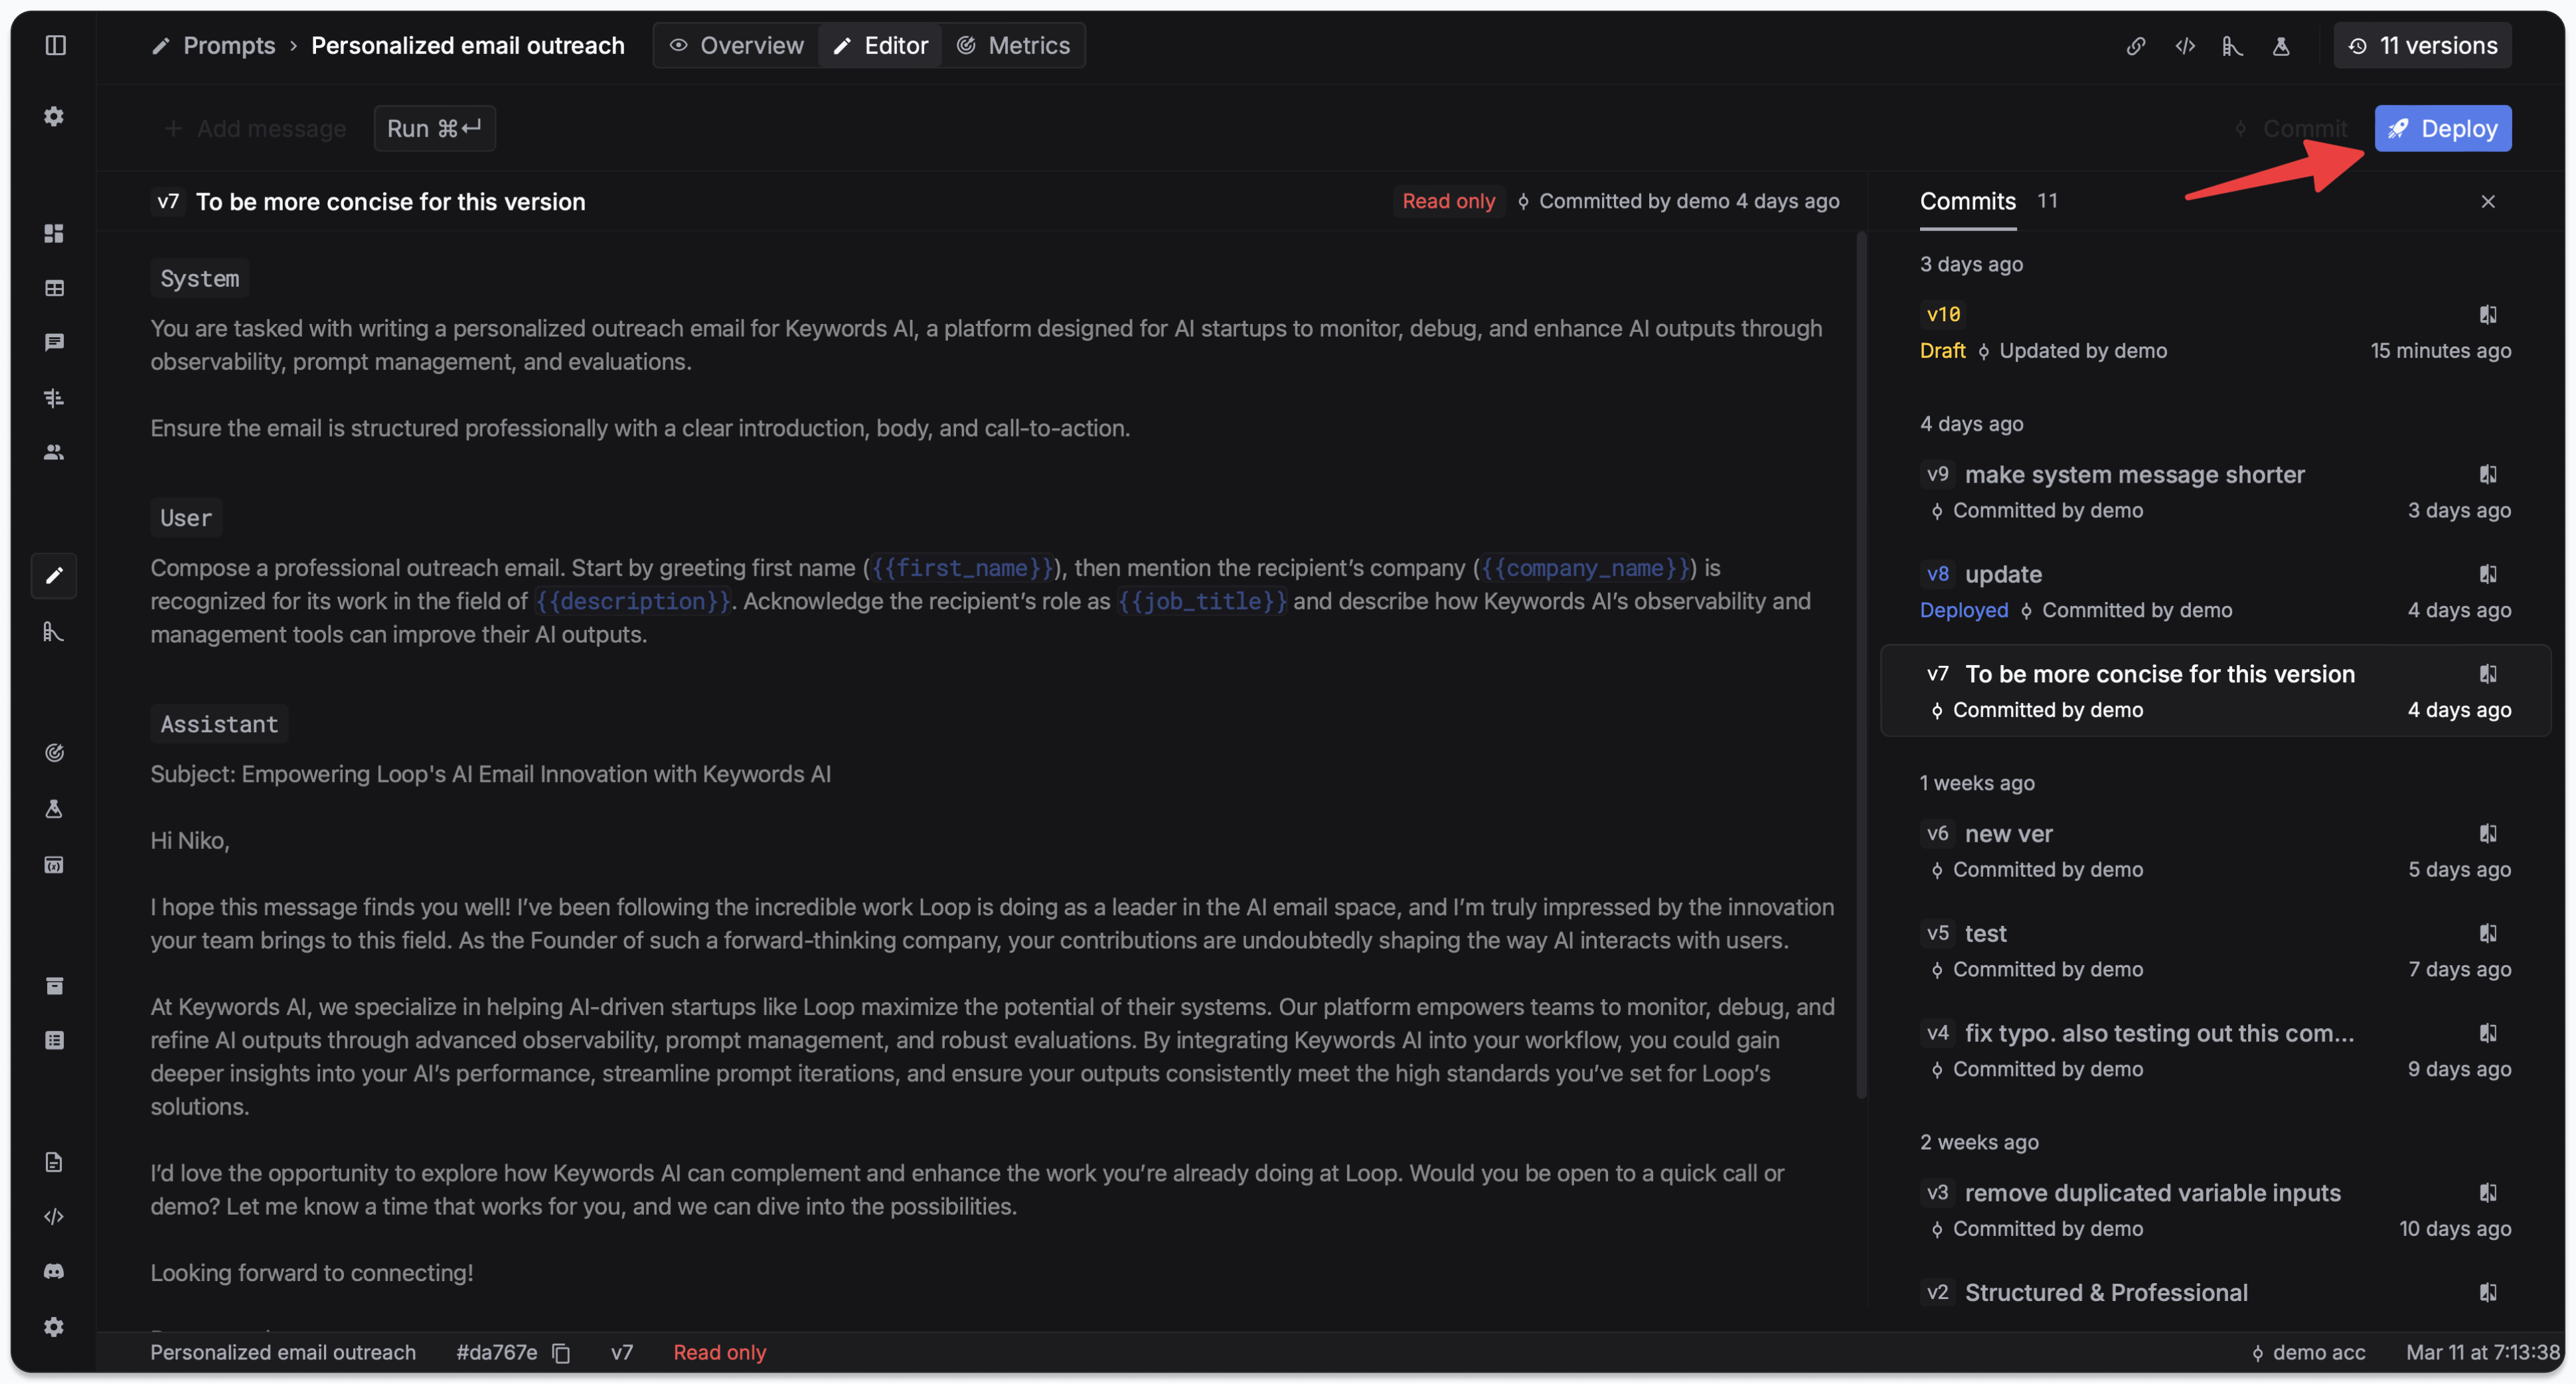 Click here to use your prompt in code.